1 - Insert SD Card
Insert a SD card (nominally a 32GB card) into your PC's SD card reader or SD card slot
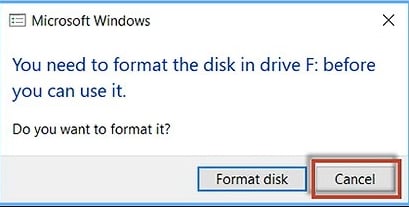
If you have used this card before, Windows may show a pop-up window offering to format the card
Click 'Cancel'
Follow these simple steps to convert your Raspberry PI into a
free NAS and Personal Cloud
Store/Backup your files on attached USB drive/s in the security of your own home network and share with any Windows, Mac, Linux, iOS or Android device on your home network or over the Internet (your Personal Cloud)
This guide explains how to copy the myUSBdrive image to a microSD card and set up your Raspberry Pi. Once complete, your Raspberry Pi will allow up to two USB drives to be shared on your local network. The USB drives do not need to be prepared or formatted to be shared. Any existing USB drive that works on Windows, Macs or Linux computers can be used. Any existing files on the USBdrive/s will be seen on the shares.
License and Terms of Use The myUSBdrive software is provided free of charge for personal use on your local network. You may install and use it on your Raspberry Pi to access files locally without any subscription fees. The software is licensed, not sold, and remains the intellectual property of its creator. The software is protected by copyright and may not be modified, distributed, or used for commercial purposes without written permission. It is provided "as is" without any warranty or guarantee of performance. By installing or using myUSBdrive, you agree to these terms and to use the software responsibly within the conditions described above.
For full Terms and conditions go to Contact
• A Raspberry Pi 3, Pi4 or Pi5 (recommended)
• A microSD card (8 GB or larger(nominally 32GB these days))
• The myUSBdrive image file (myUSBdrive_5.x.x.zip)
• A computer with an SD card reader
• The Raspberry Pi Imager tool Raspberry Pi Imager or Etcher
• One or two USB drives to share
Insert a SD card (nominally a 32GB card) into your PC's SD card reader or SD card slot
If you have used this card before, Windows may show a pop-up window offering to format the card
Click 'Cancel'
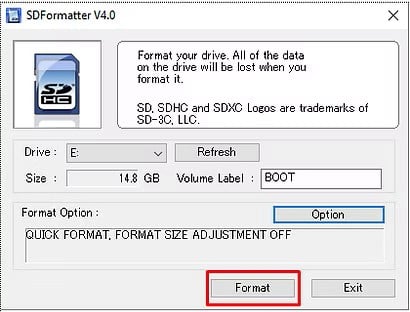
If your SD card is a "pre-used" card it is recommended to format your SD card
It is strongly recommended that you use SD Card Formatter rather than using Windows to format the SD card
The formatting tools provided with operating systems may not see all the partitions on the SD card and it may result in not all the available space being formatted
The Volume label name is not important
Download the myUSBdrive image file "myUSBdrive_5.2.6.zip"
Use Raspberry Pi Imager or Etcher to extract the image file to a new or newly formatted SD card
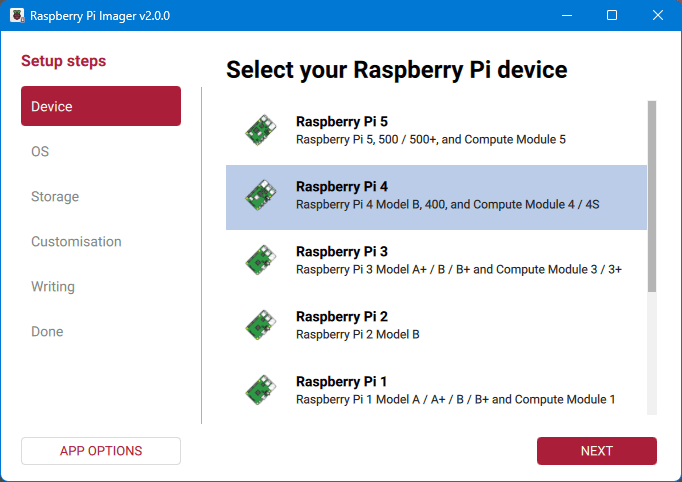
Select - Device
Launch Raspberry Pi Imager on your computer, and select your Raspberry Pi model
1 - Select you Raspberry Pi model
2 - Click Next
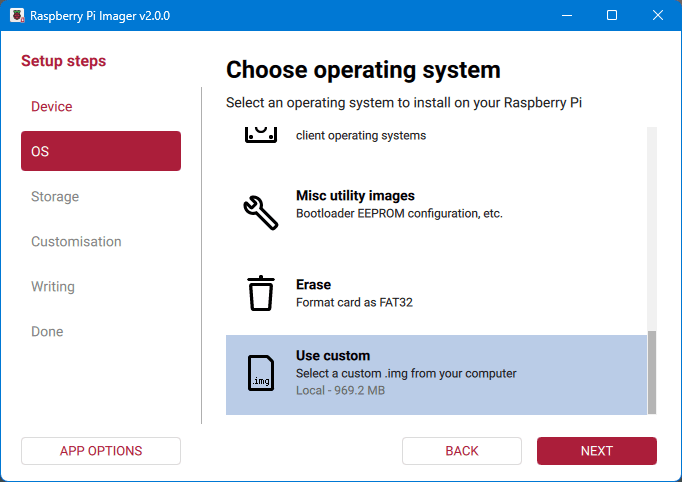
Select - OS
1 – Scroll down and choose Use custom
2 – Locate and open your downloaded myUSBdrive ZIP file
3 – Click Next
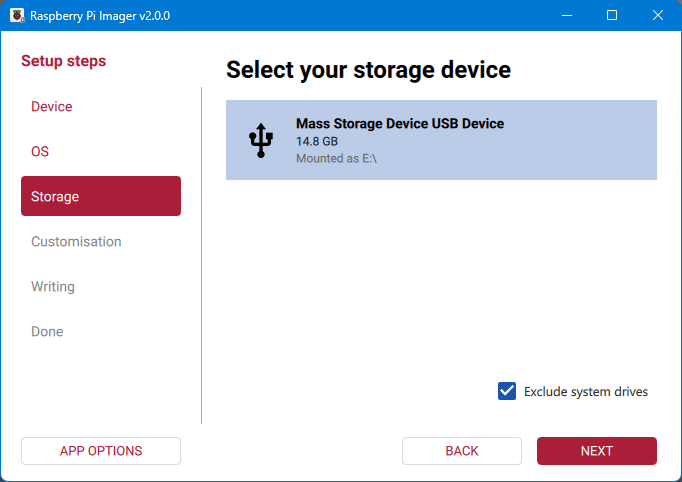
Select - Storage
1 - Insert your microSD card into the computer
2 - Choose your SD card from the list
3 - Click Next
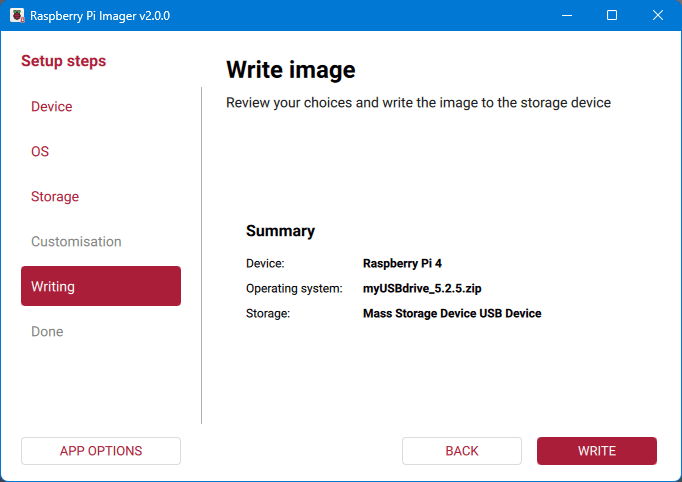
Select - Writing
1 - Confirm when prompted and click Write
2 - The process may take a few minutes
When it finishes, safely remove the SD card
NTFS, exFAT and Fat32 file formats are all supported, but must be formatted with One Partition only - See Fine Tuning (MUD can see the attached Drive but not its Content)
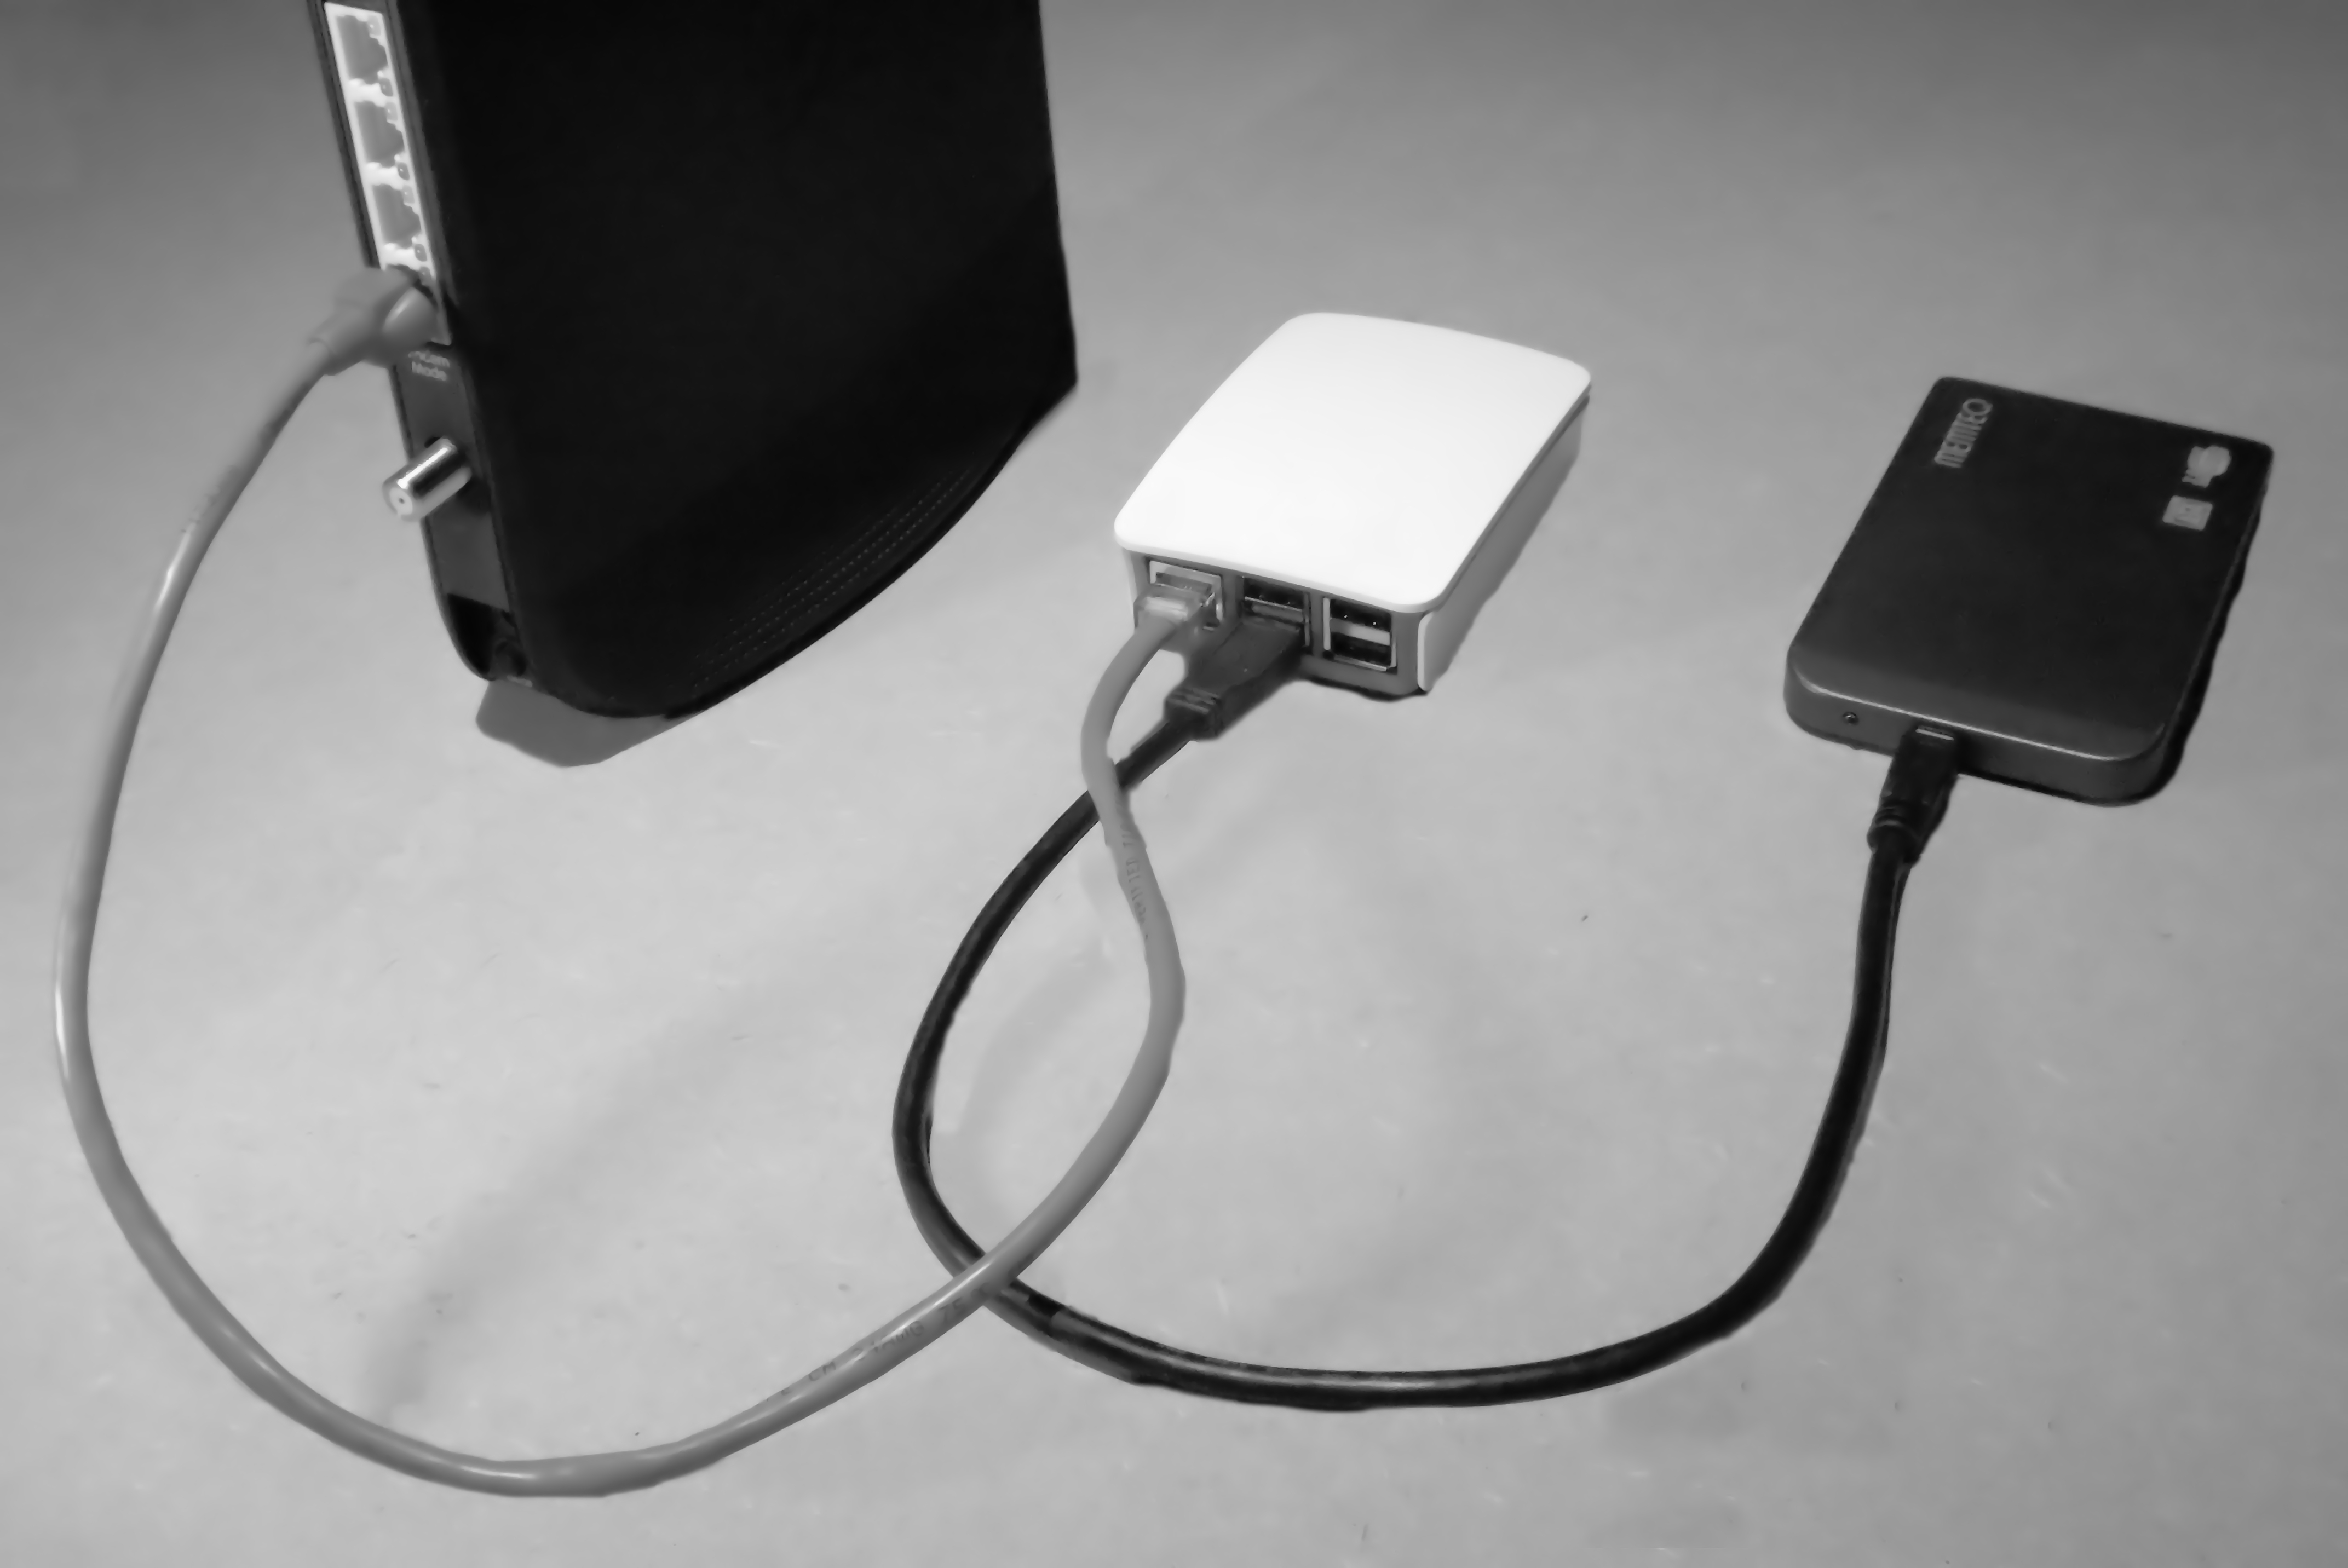
Insert the MyUsbDrive (MUD) SD card into your Raspberry PI
1 - Attach a USB hard drive to your Raspberry PI
NOTE:
At this stage we recommend only to use only 1 USB hard Drive;
Up to 2 USB hard Drives are supported, however if connecting 2 drives at least one MUST be an externally powered hard drive
2 - Plug your Raspberry PI to your Router using an Ethernet cable
WiFi connection is not supported at this stage - see Fine Tuning
2.1 - Optionally - Connect the Raspberry PI to a TV/Monitor
(Once the Login prompt appears you know that the Pi has successfully booted up)
3 - Turn the Raspberry PI on
The system will start automatically
MyUsbDrive (MUD) is now ready to be used
NOTE:
Once up and running the hard drives will be seen as
"USBdrive1" and "USBdrive2"
Once the Pi has started (allow 1–2 minutes):
1 - On another device connected to the same network, open a web browser
2 - Go to the default web page: http://mud.local:8080
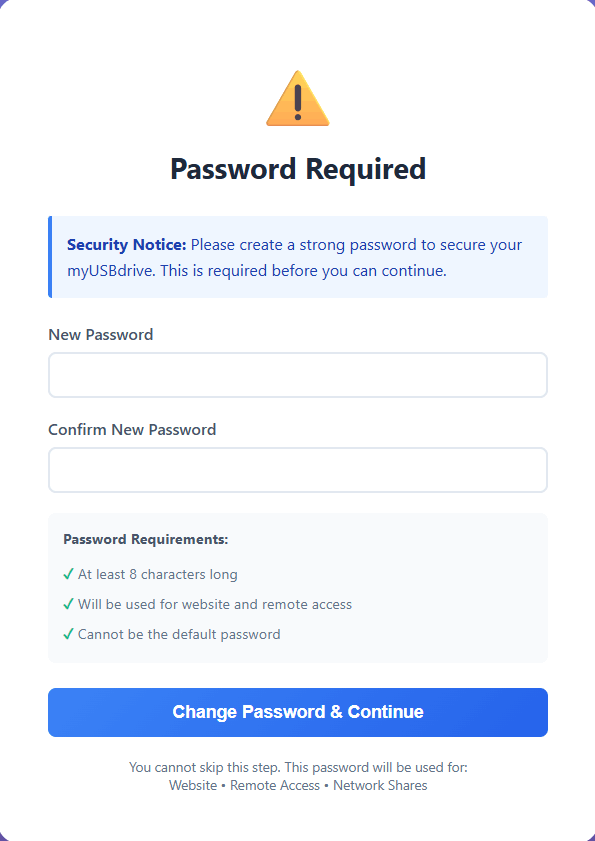
3 - Set a password when prompted to secure your shared drives
4 - Click Change Password & Continue
NOTE:
If you did not connect a USB drive in Step 9 above; The USB drive/s that you want to share don’t have to be connected during setup. The website dashboard will guide you through connecting them and restarting your Raspberry Pi - see Fine Tuning
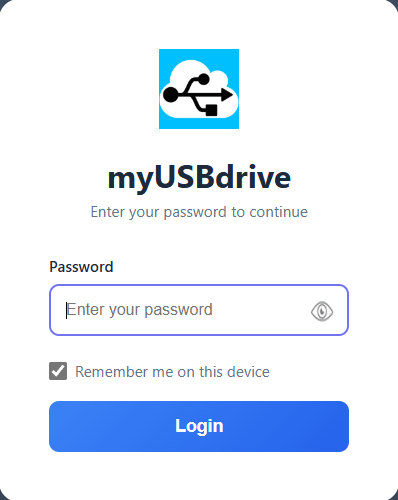
6 - Enter the password you set above
7 - Click Login
Wait 1 or 2 minutes; then refresh the web page (F5)
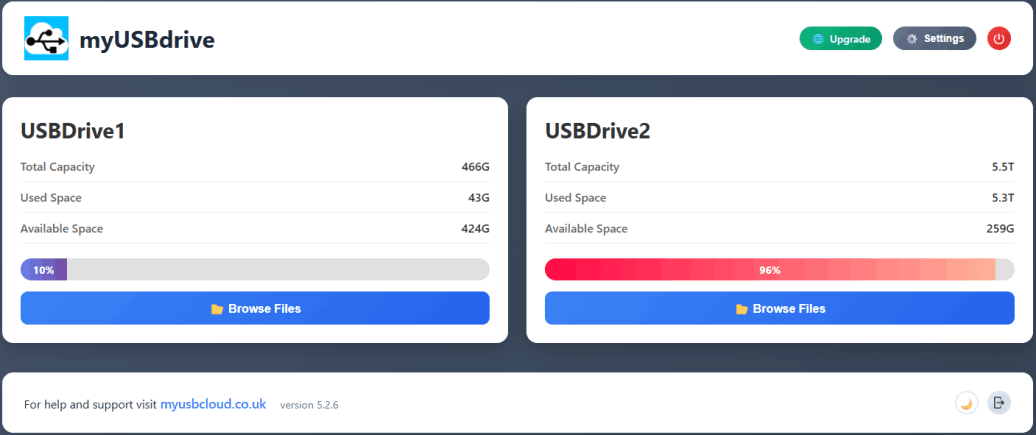
Your USB drives are now accessible
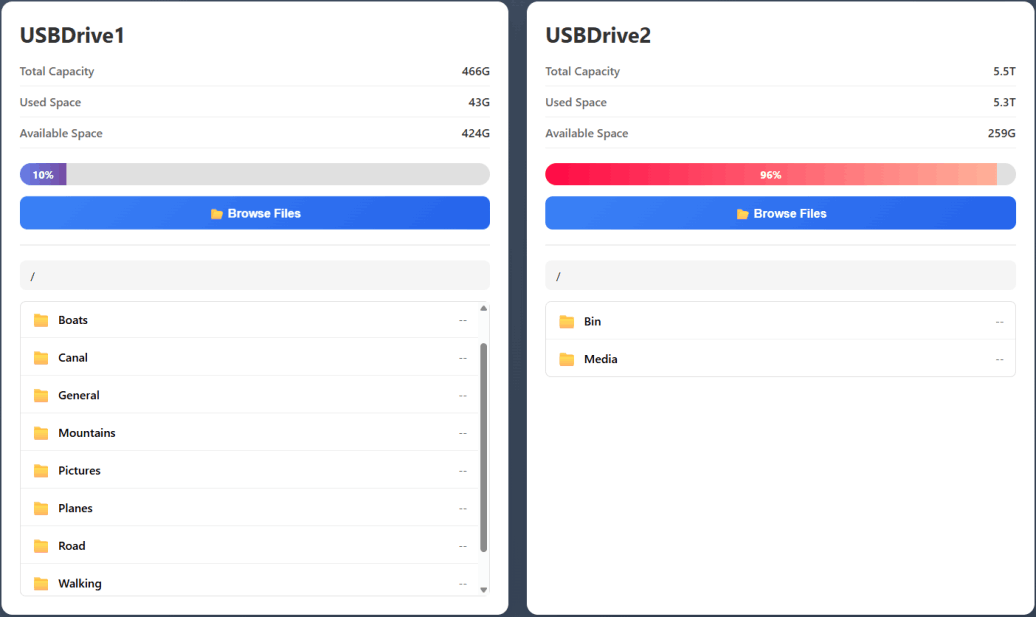
1 - To access the files on your attached USB drive/s
Click Browse Files
You can now access and download your files
NOTE:
Using a browser to the access your files you are able to Download files
If you wish to Upload, Manage or Stream please upgrade to myUSBcloud
To Access your files and be able to Download, Upload, Manage or Stream:
Use your Windows File Explorer or in MAC/Linux Files
See Step 13
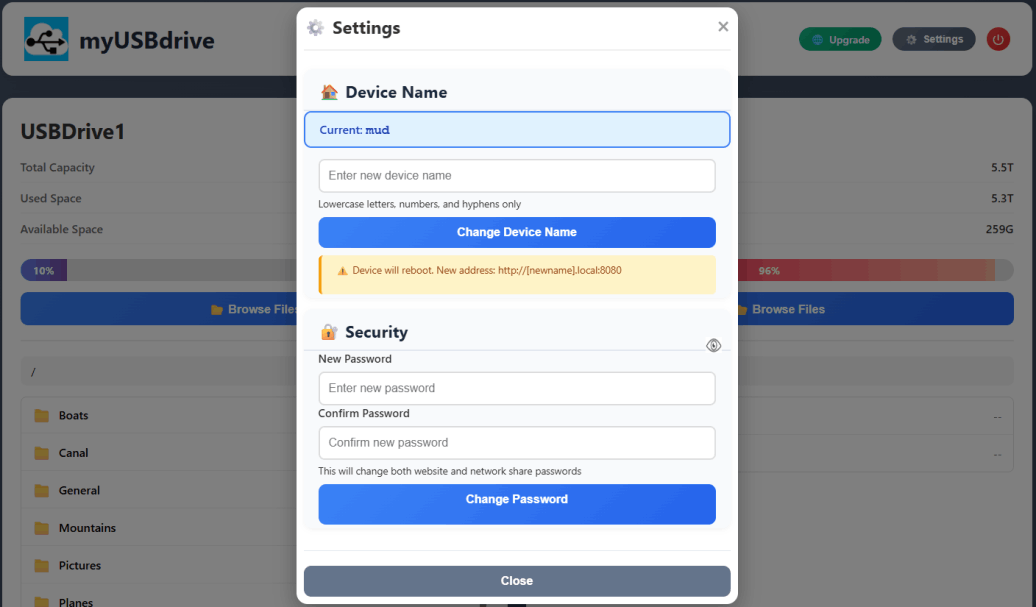
You can change the name of your myUSBdrive to something that suits the contents of your attached Drive/s
Such as "Backup" or "Pictures" or "Media" etc.
1 - Click Settings
1.1 - To change the device name - Select Device Name
1.2 - To change your password - Select Security
2 - When finished Click Close
NOTE:
The Password is "Yours", if you have forgotten it (don't panic)
Simply follow the Getting Started procedure and configure a new SD card
You will not loose any files or data as these are on your attached USB drive/s
To Access your files and be able to Download, Upload & Stream:
Use your Windows File Explorer or in MAC/Linux Files
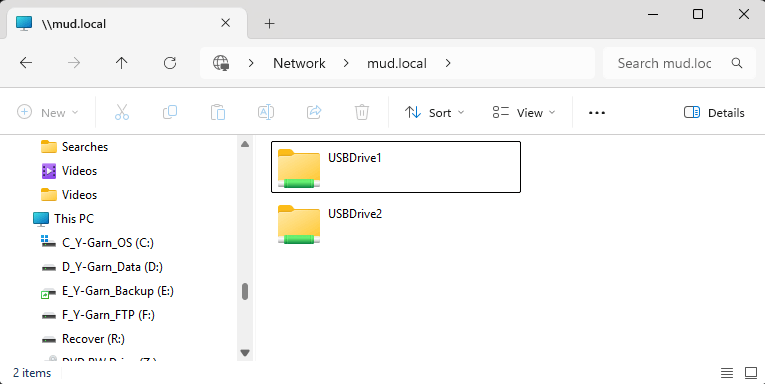
- From Windows: \\mud.local
- From macOS/Linux: smb://mud.local
'MUD' (MyUsbDrive) will show up as a network device after a few minutes
1 - Open File Explorer
2 - Clicking on the USBdrive1 or USBdrive2 folder will give you access to all the files on the USB hard drive/s that you attached to you Raspberry Pi
Lots of clever things can be done with your new NAS such as using a KODI to stream your media files
See Silver Lining or Fine Tuning
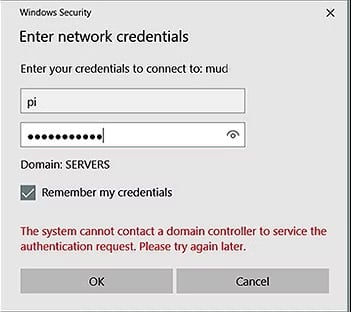
When connecting to your MUD from a PC or Laptop running Windows 11 or which is normally connected to a Domain i.e. a Work Laptop; you may be asked to enter a 'User Name' & 'Password'
User Name = pi
Password = "as set by you"
Tick 'Remember my Credentials' and you will not need to enter the Login credentials next time